Configure Microsoft 365 Graph API for WorkflowMail (formerly FlowMail)

If you're using Microsoft email services within your organization and want to use your Microsoft infrastructure to send transactional emails from Shopify with WorkflowMail, please follow this guide.
Using the Microsoft Graph API is the recommended approach for connecting M365 services, rather than relying on SMTP credentials or app passwords.
1. Register a new application
To obtain your Tenant ID, Client ID, and Client Secret, create a new application in the Microsoft Azure Portal
Microsoft Azure > Azure services > App registrations > New registration
Fill out the form and click the "Register" button
| Name | FlowMail app |
| Supported account types | Accounts in this organizational directory only (______ only - Single tenant) |
| Redirect URI (optional) | leave blank |
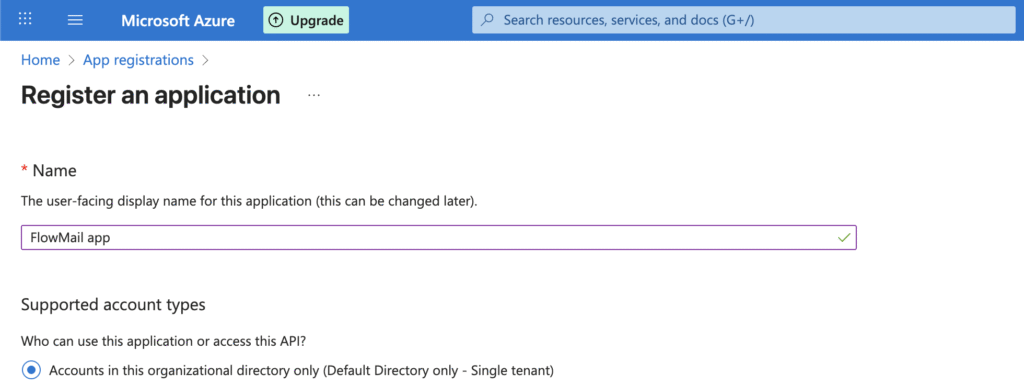
Click Register.
Find your app in App registrations → All applications → FlowMail app
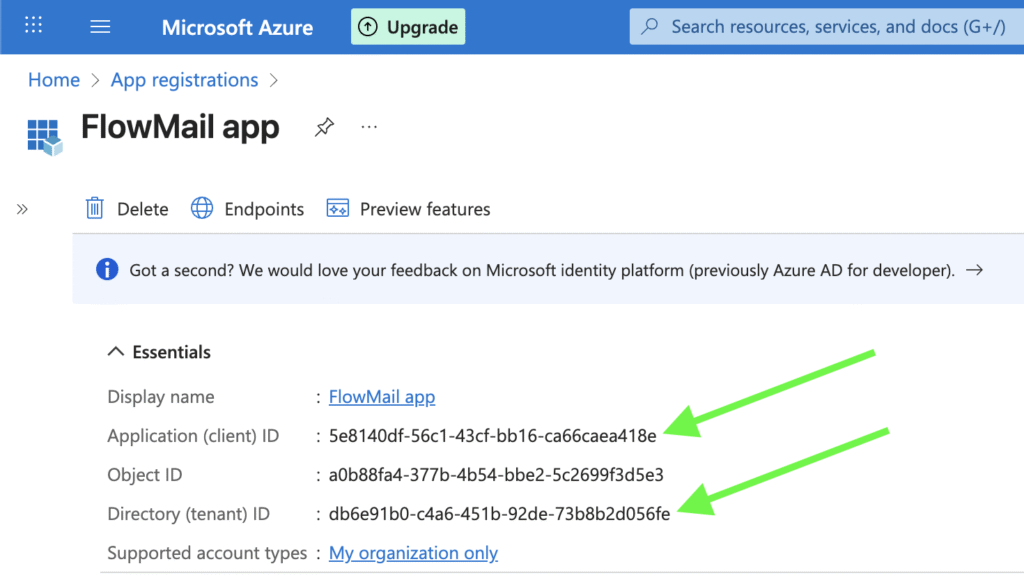
2. Copy your Tenant ID and Client ID
Once registered, you’ll be redirected to the application’s overview page.
Copy the following values:
- Application (client) ID
- Directory (tenant) ID
3. Create a client secret
Next, generate a client secret:
Path:
Manage → Certificates & secrets → + New client secret
Fill in:
- Description: FlowMail app
- Expires: 730 days (24 months)
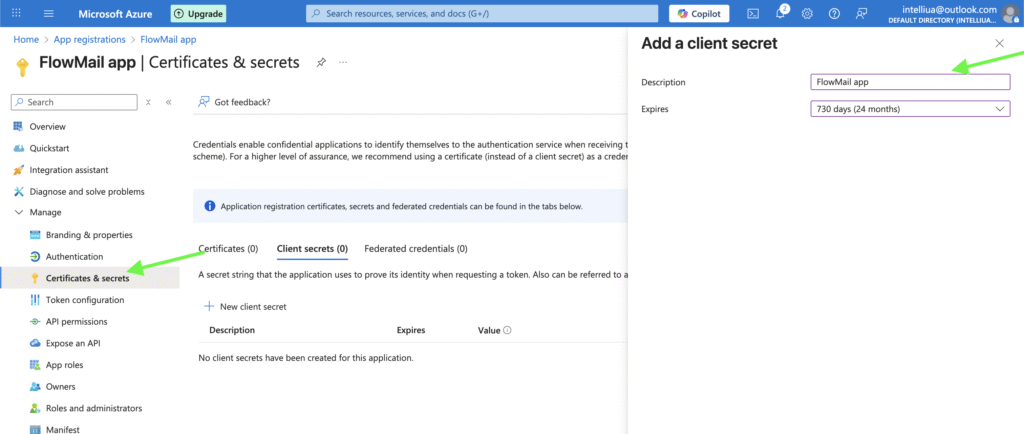
Click Add.
A new Secret Value will be displayed — copy it immediately and store it securely (it is only available once generated – after that you cannot view it again).
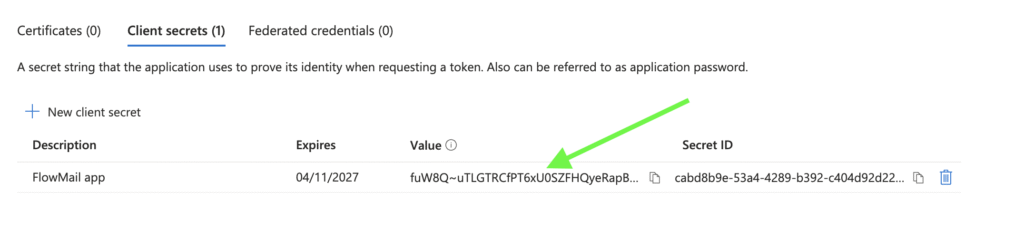
4. Add API permissions
Finally, grant the necessary permissions for sending emails:
- Go to Manage → API permissions → + Add a permission
- Choose Microsoft Graph → Application permissions
- Search for and select Mail.Send
- Click Add permissions
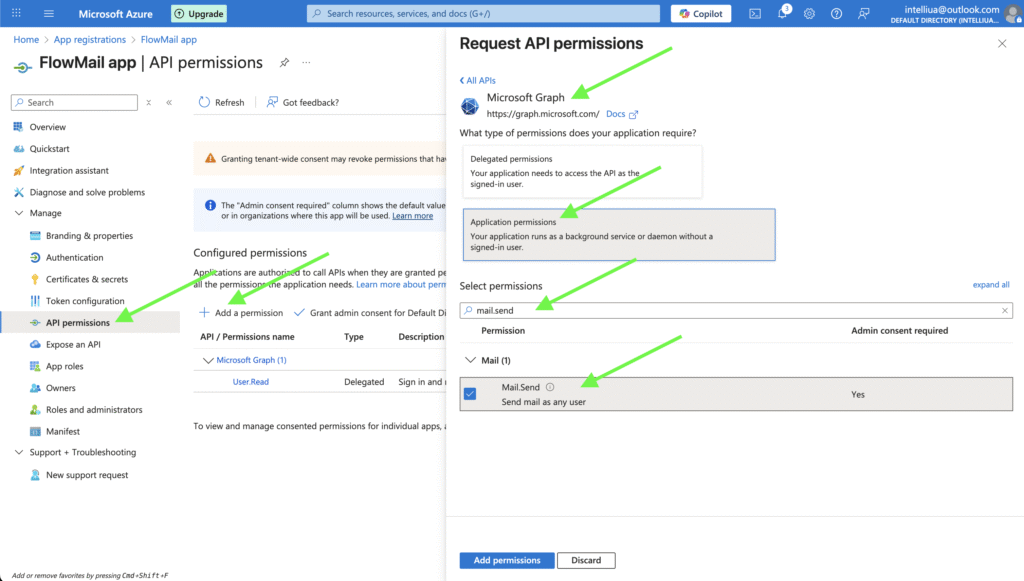
Then click Grant admin consent for [Your Company Name]
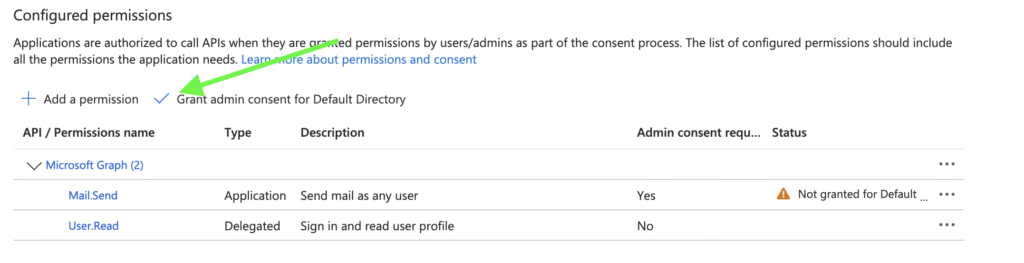
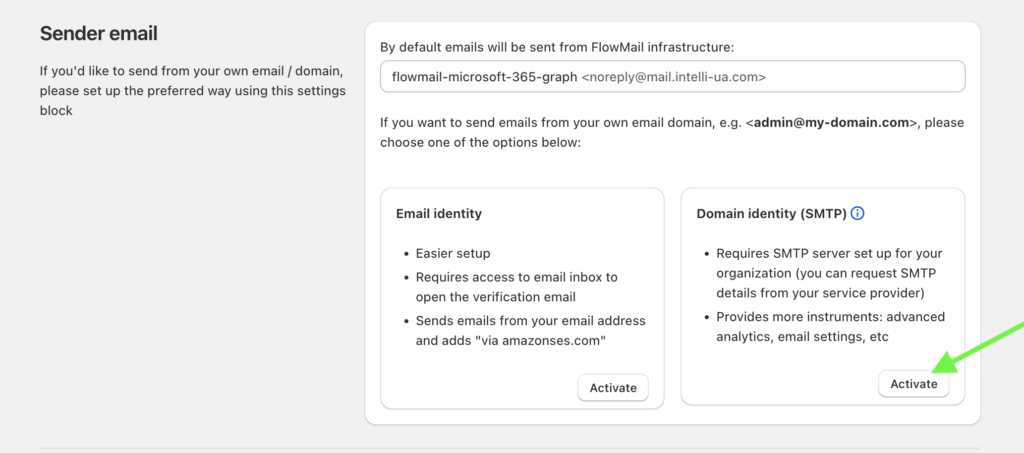
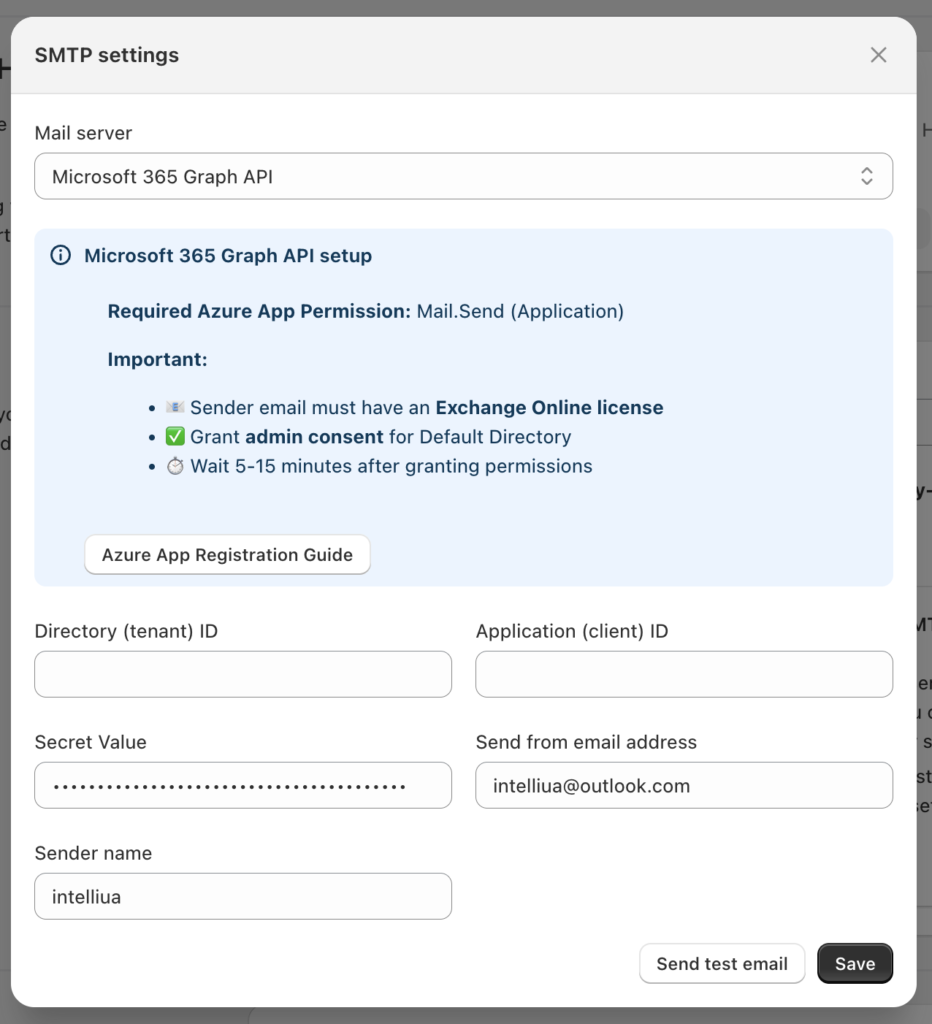
Then use these settings in your Shopify Admin → WorkflowMail → Settings → Sender email → Domain identity (SMTP) → Mail server preset → Microsoft 365 Graph API